If you wish to use Mimer from home you can go to www.mimer.com and download a Mimer development version for, among other choices, Windows, Mac OS X or Linux. (For running Mimer on a Mac, see the notes below.) If you install this on your own computer at home, you can do the lab assignments from home, either by connecting to our Mimer server or by creating your own local database and using that.
Before you can download the Mimer software, you must create an account on the Mimer web site. This is not the same account as the one you will be using on our database server (basen.oru.se), so you must create a new account on the Mimer web site. (They probably want to send spam to you.) Go to https://developer.mimer.com/product-overview/downloads/, chose your operating system, and then click "LOGIN" and after that "Register".
The Mimer web sites mimer.com and developer.mimer.com were extremely slow in Firefox. When I turned off tracking protection for both sites, it worked better.
| Note: Some details, such as Mimer's version number, can be different here from on the machines. |
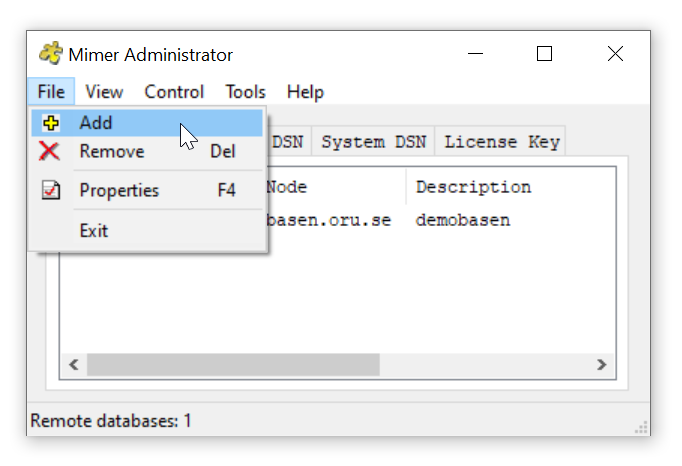
To connect to a Mimer database, you must first tell the local Mimer installation that the database exists.
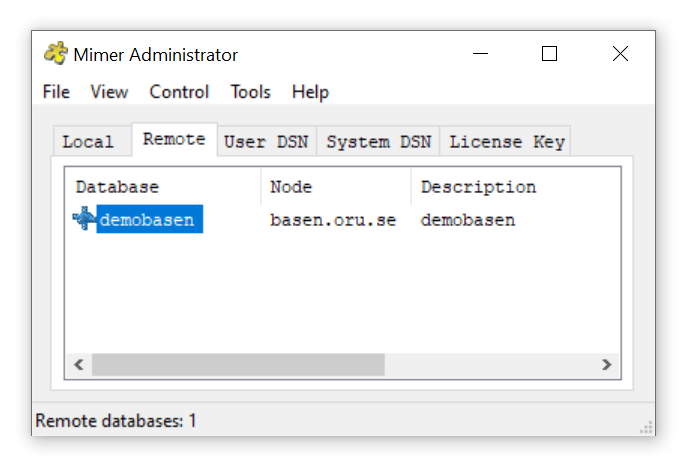
Click on the Windows symbol to open up the "start menu", scroll down to Mimer SQL 11.0.5A (but maybe with the version you have installed, instead of 11.0.5A) and choose Mimer Administrator from the menu. When Mimer Administrator has started, choose the tab Remote to register a remote database:
That the database is "remote" means that it is stored on a server, and not locally on the same machine.
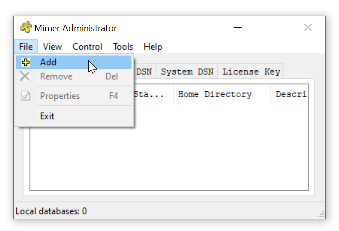
The database dbk may already be listed, but if it isn't, you have to add it. Click on File and then on Add:
In the Window that appears, enter the name of the database (dbk). The Node name should be basen.oru.se. If you are doing this on the university computers, you might not have permission to create system data sources, and in that case uncheck the check box for Create System Data Source.
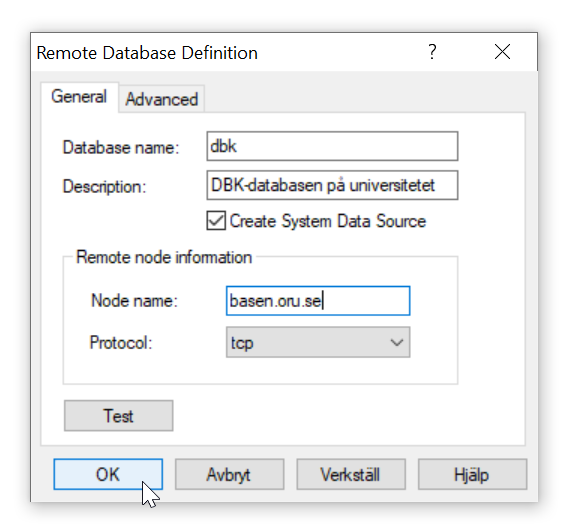
You can click Test to test that the server can be reached and is responding, but then click OK.
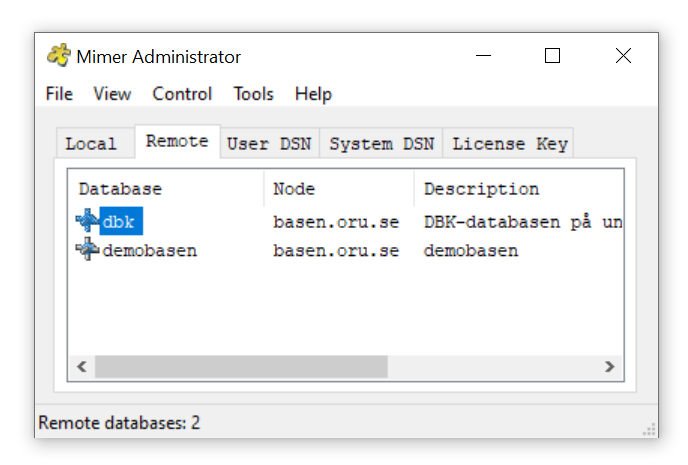
When you click OK, the new database will show up in the Mimer Administrator window. You can now close that window.
If you get an error message saying Error creating data source something, you forgot to uncheck Create System Data Source. Mimer will work anyway.
Click on File and then on Add:
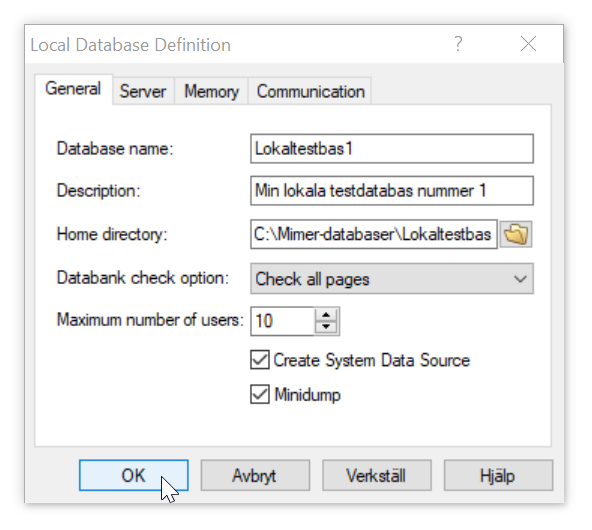
In the Window that appears, enter the name of the database (dbk). The Home Directory should be a directory (or "folder") on your machine that Mimer will use to store the data in the database.
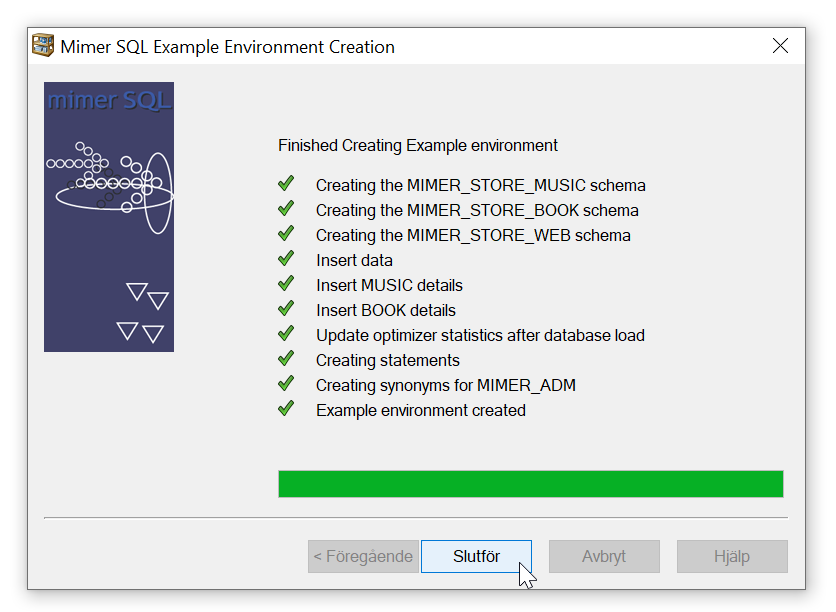
Keep clicking Yes and Next to everything, until you get to Finish and the process is finished. The final window will look like this:
Now you can connect to the database and start giving SQL commands. There are two ways to connect to a Mimer database using SQL:
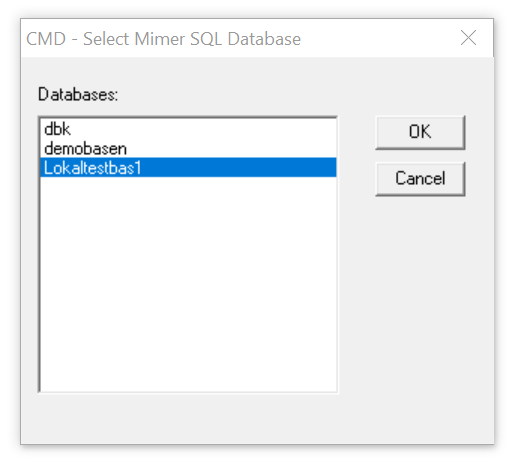
Choose the correct database, and click on OK. A text window will open, where you can enter your user name and your password for that thatabase, and then type in SQL queries. Queries can span several rows, and must end with a semi-colon (;).
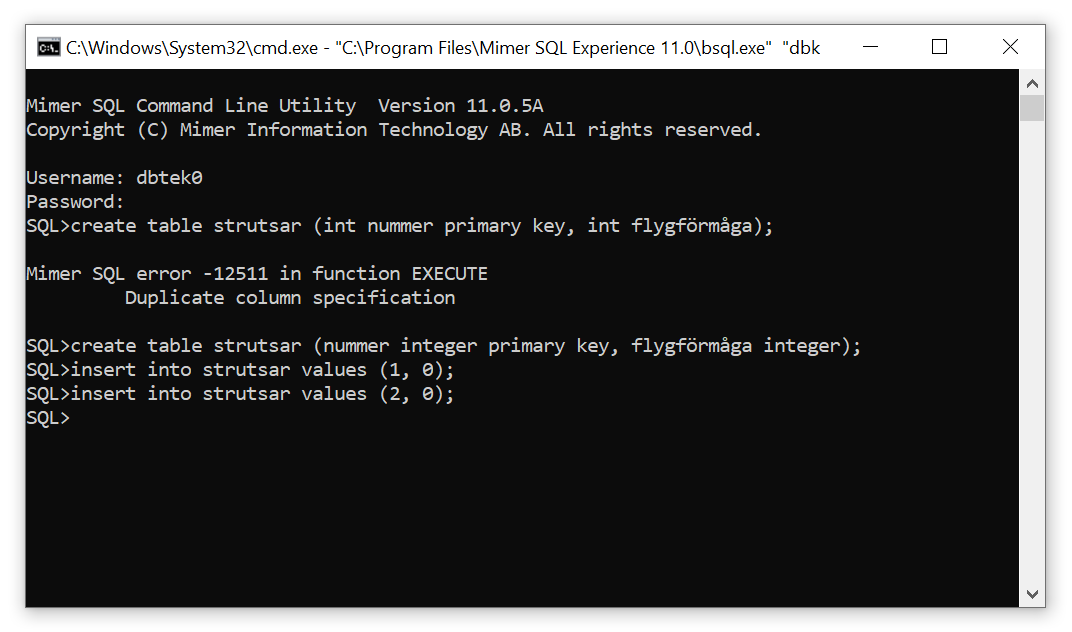
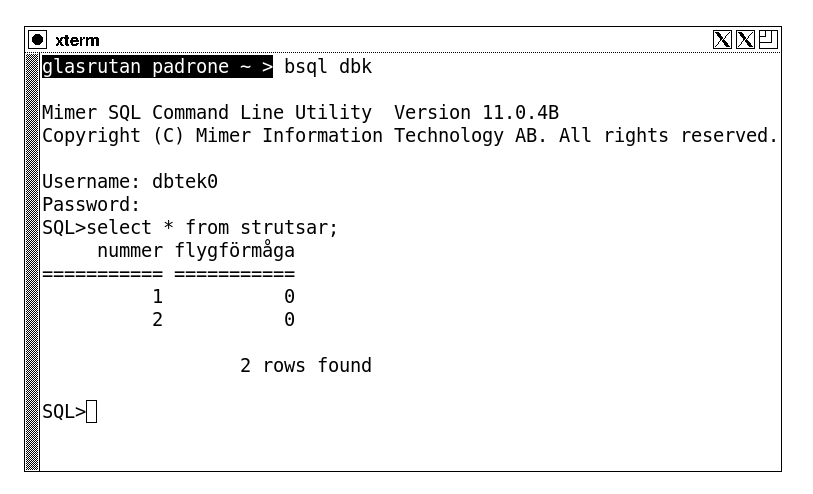
On Mac OS X and on Linux, you should instead open a terminal window, and give the command bsql in that Window. Add the database name as argument to bsql:
Start DbVisualizer from the start menu: Click on the Windows symbol, scroll down to Mimer SQL 11.0.5A, and choose DbVisualizer from the menu. The DbVisualizer window looks like this:
Since DbVisualizer is a Java-based program, you might have to install the Java runtime environment. In that case, a window similar to this will open the first time you start DbVisualizer:
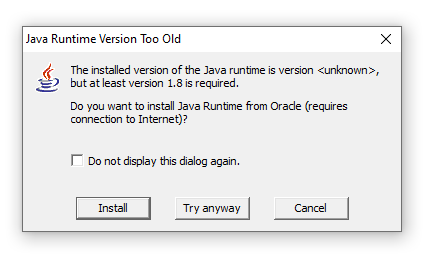
Click Install, and complete the Java installation.
The first time you start DbVisualizer (or later if you deliberately run it) the New Connection Wizard will open, to help you configure DbVisualizer for connecting to a database:
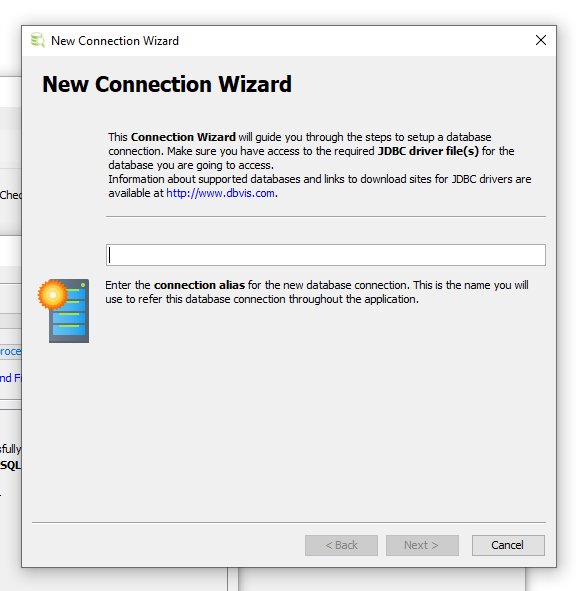
Enter the name of the database connection (for example dbk) and click Next.
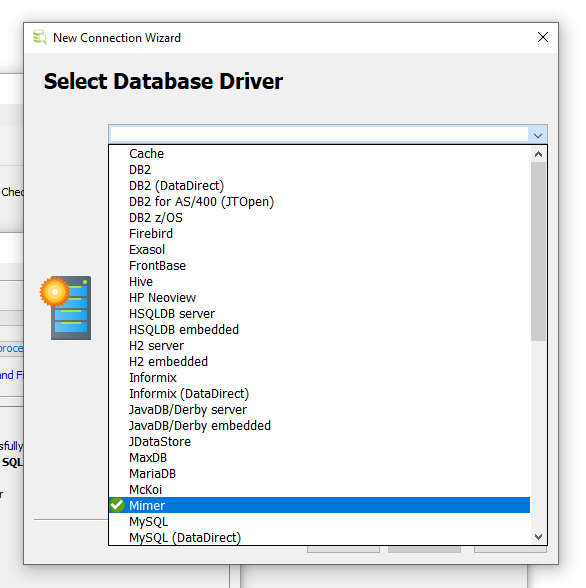
You also need to select which "JDBC driver" (a plugin program that helps a Java program connect to the datbase) to use for this connection. If this is the first time you have started DbVisualizer, it probably runs the "JDBC Driver Finder" automatically, showing up in a separate window looking like this:

You can just close that window. The connection wizard has a step where you select which driver to use:
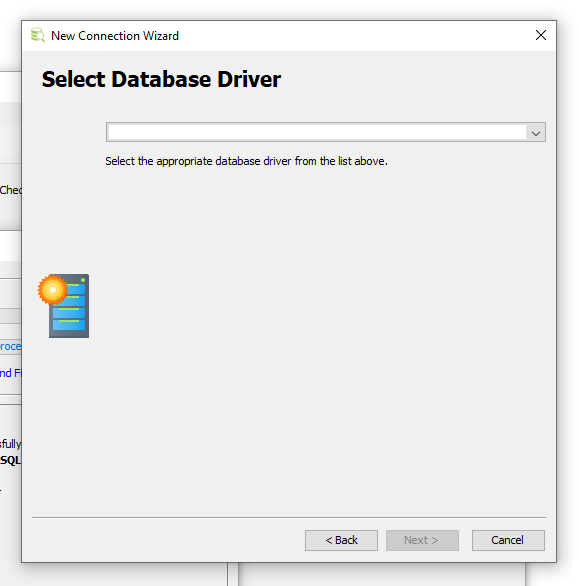
The driver is specific to each DBMS, and you should use the one for Mimer. If you are using the standard DbVisualizer that is included with the Mimer download, that is the only driver available.
Finally, fill in the database server (basen.oru.se if you are using the university's server and not your own local database), the database (dbk), and the user name (for example dbtek42) and password that you have received:
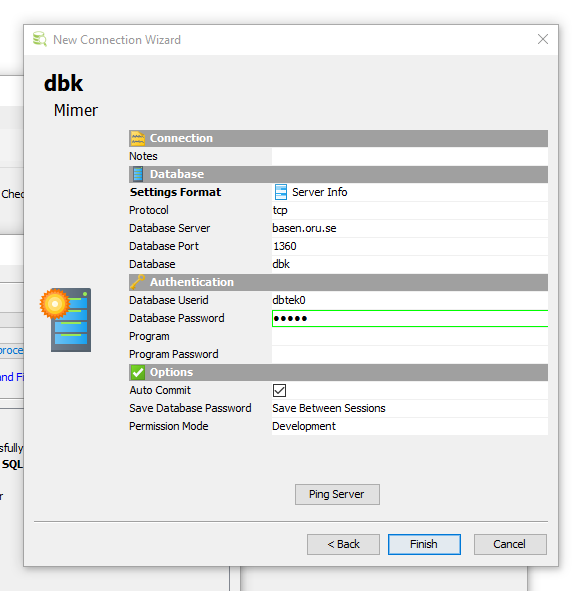
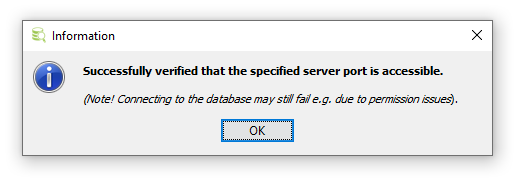
You can click Ping Server to test that the connection works:
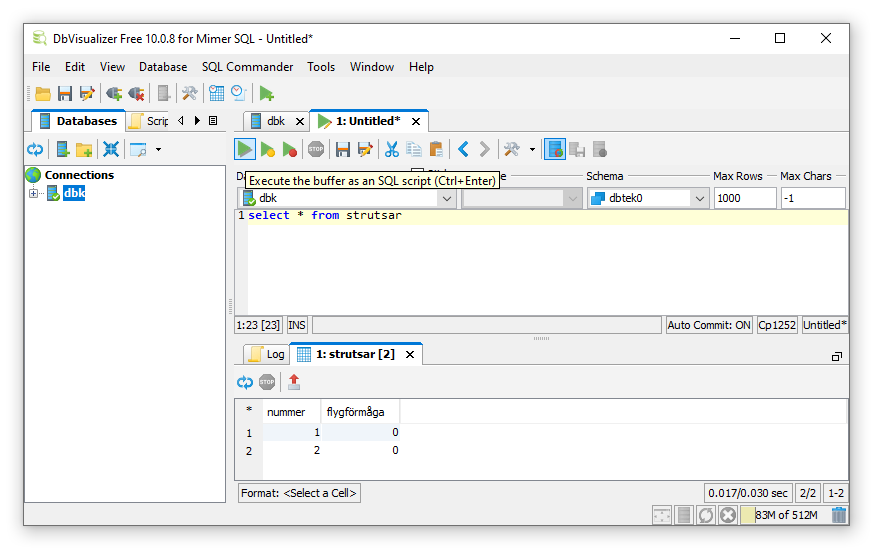
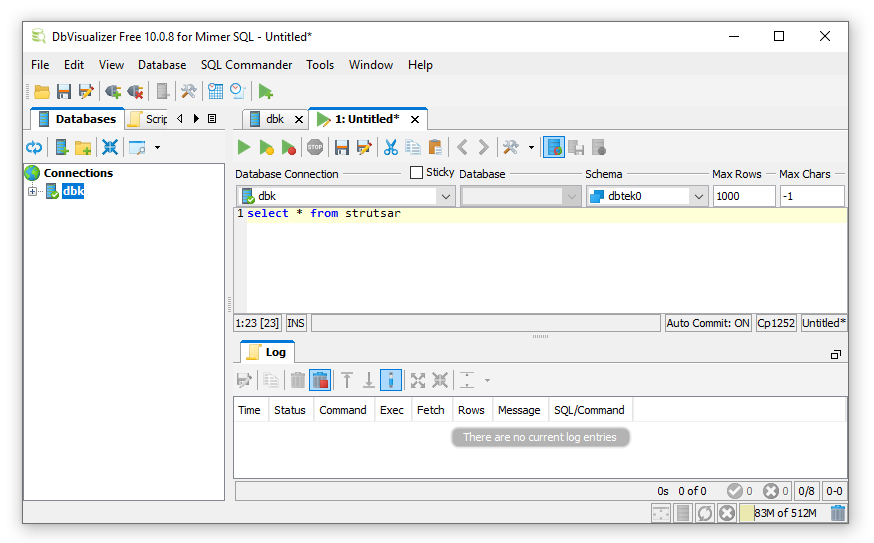
Finally, click Finish to complete the configuration of the database connection. Now you can use DbVisualizer's main window:

The green arrow with a plus sign creates a new "SQL commander tab", which is a frame where you can type and run SQL queries. In the free version of DbVisualizer, you can only have one at a time.
The three green arrows below are used to run the query in the SQL commander tab. You can keep the mouse still over them ("hover") to get help pop-ups that tell what they do.
(The images in this sections are from an older version of Mimer, but more recent versions are very similar.)
Click on Start, then on All Programs, then on Mimer SQL Engine 10.0, and choose Mimer Administrator from the menu. When Mimer Administrator has started, choose the tab User DSN to create a data source:
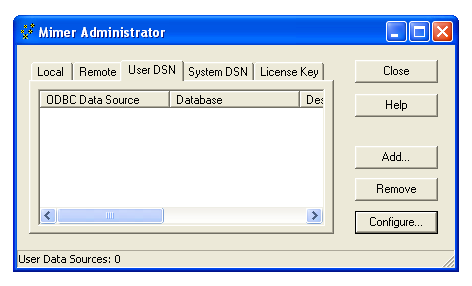
A user data source can only be used by the user who created it, as opposite to a system data source, which can be used by anyone.
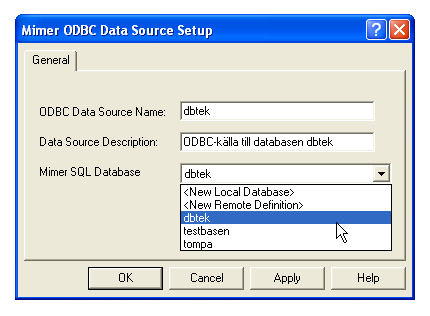
Click on the Add to create a new user data source.
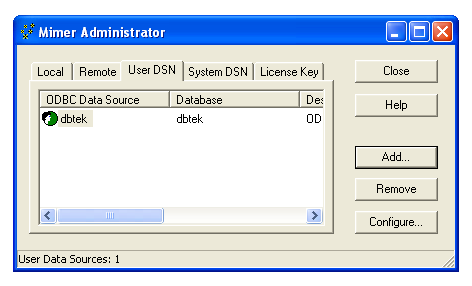
Finally, click OK, and see how the new data source shows up:
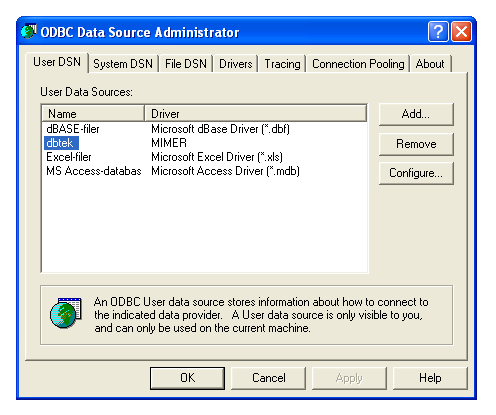
ODBC data sources can also be managed centrally in Windows, using the ODBC Data Source Administrator in the control panel. The newly created data source shows up there too:
On Windows, you can get the documentation in a standard Windows help window. Click on the Windows symbol to open up the start menu, scroll down to Mimer SQL 11.0.5A, and choose on Mimer SQL Documentation.
There is an FAQ list too.
Then you can run the application Mimer SQL Database Install from Finder to create a local database. You can then open a command window and start Batch SQL with the command bsql name, where name is the name of the local database you just created. Login with the username sysadm and the password you speciefied when you created the database. To be able to create tables, you must first create a databank. Give this command in Batch SQL:
CREATE DATABANK mybank OF 1000 PAGES IN 'mybank.dbf' WITH LOG OPTION;
If you want to connect to the database server at the university, you must first "create a remote database". Open a command window and give this command:
sudo mimhosts -r dbk basen.oru.se
You can then use the command bsql dbk to connect to the university's Mimer server. Login with the username and password you recieved from the teacher.
See also https://developer.mimer.com/article/installing-mimer-sql-on-macos/