Locksim on Windows
I think that the simplest way to run Locksim under Windows is to
download the Zip file with the source code, create your own
(empty C++ windows console) project in Visual Studio,
and then just add the source files (and the header file "locksim.h") to your project.
But if you find that difficult, there is also a Visual Studio project file that can be downloaded.
Instructions on how to use your own project:
- Locksim has been tested with several older versions of Visual Studio,
but these instructions assume Visual Studio Community 2019.
- Download and install Visual Studio Community 2019, if you haven't already done so.
It is free and can be downloaded from Microsoft.
I found it at
https://visualstudio.microsoft.com/free-developer-offers/,
but you might need to Google for it.
Microsoft sometimes reorganizes their web pages.
- Download the Zip file with the Locksim sources:
locksim-0.4-source.zip
- Unpack the Zip file, and remember where you unpacked it.
- Start Visual Studio.
- Create an empty project, for example called Locksim.
It should be an empty, C++ Windows Console project.
- In Solution Explorer, right-click on Header Files, choose Add and Existing Item.
Find where locksim.h is among the source files you just downloaded
(in a sub-folder called locksim-0.4\src), and select it.
- In Solution Explorer, right-click on Source Files, choose Add and Existing Item.
In the same folder as you found locksim.h, there are a number of .c source files.
Add all of those.
- Click on Build in the menu bar, and choose Build Solution.
- When the build is finished, and the output Window shows "Build: 1 succeeded",
click on Debug, and choose Start Debugging (or Start Without Debugging).
- You should get an error message from Locksim, starting with "Usage:",
since you haven't provided any command-line arguments.
- Find the executable, Locksim.exe.
On my computer, it is in a folder called C:\Users\Padrone\Source\Repos\Locksim\Debug.
- You can drag and drop scenario files on the icon.
As a better alternative, you can start a command window,
change directory to that Debug folder, and run Locksim in the command window.
Instructions on how to use the prepared Visual Studio project:
- This has only been tested with Visual Studio Community 2019.
The project file probably doesn't work with older versions.
- Download the Zip file with the Locksim project:
Locksim-0.4-project.zip
- Unpack the Zip file.
- Find the project file, Locksim\Locksim.sln, and click on it to start Visual Studio
- Build the project, find the executable, and run it, as in the instructions above for your own project.
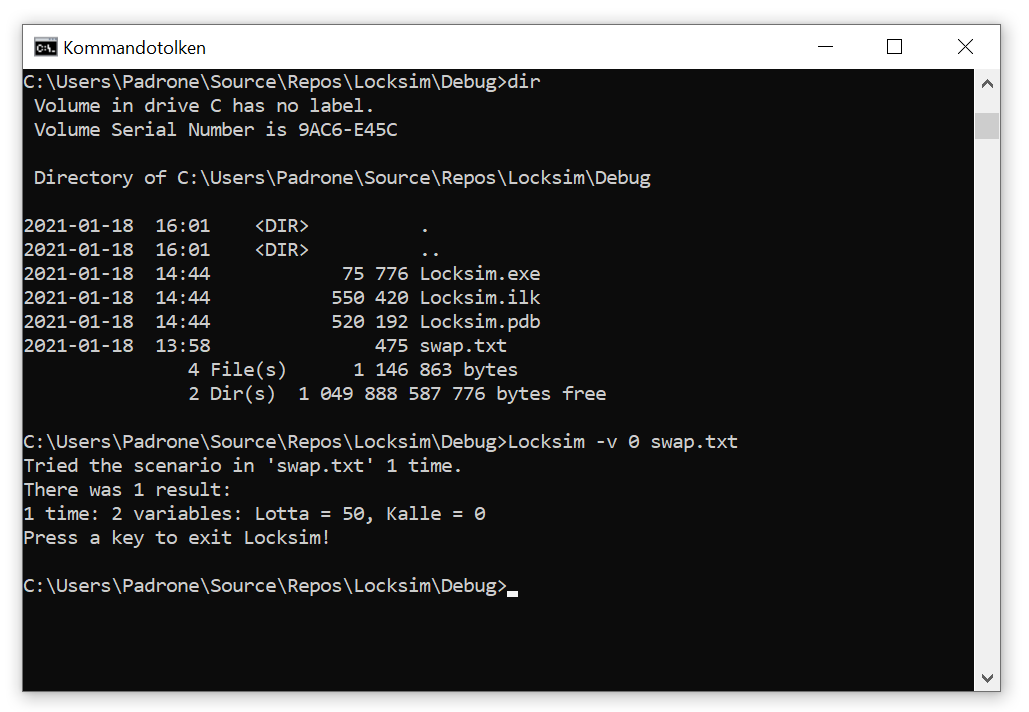
Here is an image of Locksim in a command window:

Some more information:
If you download the project file, you might still want to download the
source file locksim-0.4-source.zip.
It contains the same C source as the project,
but also some example scenarios.
A process in Windows or in Linux, such as Locksim when it is run,
has a current working directory (or "folder").
It is not necessarily the same directory as the one where the executable file (the "exe" file) is located.
When opening a file given withouth a full path name,
such as the file name "swap.txt", it will be searched for in the current working directory.
You can change the current working directory in the Windows command window with the command cd.
Thomas Padron-McCarthy
(thomas.padron-mccarthy@oru.se),
January 18, 2021

